
Image ©Hemera Technologies Inc.
5 Safety Tips Every K-8 Teacher Should Know for Chemistry Lessons
A Workshop Got me Thinking
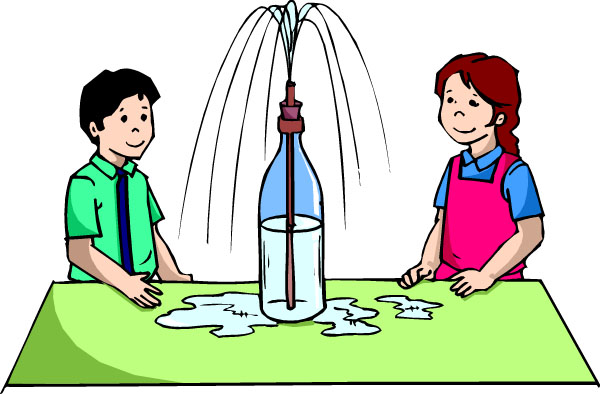
I once attended a workshop designed to show teachers how to use science demonstrations to motivate children to learn science. An exciting demonstration suggested for teachers of grades 4-6 was colorful and showed rapid expansion of a foamy substance. It looked like the makings of a fiery volcano to me.
During the discussion of the demo, it became apparent to me that only an elementary school teacher with some chemistry background would be able to do the demonstration. The chemicals used were strong acids, bases and/or salts, the safety precautions needed were elaborate, and the potential for accident was high.
In the hands of a knowledgeable teacher, the demo would have been appropriate; otherwise, the liability would have been unacceptable. Would the training of one workshop have been adequate? Maybe. Maybe implementing the suggestions below will be sufficient for most demonstrations. But I would not recommend that a teacher without some science safety training do the above demo--which combined large (> 15 ml) quantities of a strong acid and a base and produced a caustic salt--in a classroom with children.

Image ©Hemera Technologies Inc.
The 5 Safety Tips
What are the safety measures that are necessary for such demos? Let me suggest some of the safety measures that can be used with chemistry demonstrations and activities in elementary school science.
- Have an accident clean-up kit positioned within easy reach of the teacher.
- Work on a chemically inert surface that is large enough to place the materials and do the demonstration without the demonstrator feeling crowded or awkward.
- Dress yourself and all students that are participating in the demonstration or hands-on activity in chemical splash goggles and plastic or rubber-coated aprons; also, closed-toed shoes and tied-back long hair are a must. Have all other students keep far enough back that no splashes or spills will make contact with the student.
- Purchase and store only enough chemicals for your immediate needs. Be sure all chemicals are properly labeled and stored in a locked cabinet.
- Do all demonstrations and hands-on activities at least once in the company of another adult before showing/doing the lab with the children. Discuss and arrange for any safety precautions that become evident from your trial run, from your reading about the activity, and from your knowledge of science activity safety precautions and rules.
When can you NOT follow the Rules?
Are these all of the Rules?
When do these rules not apply? When the chemicals you are using are only baking soda, vinegar, common table salt, soap, sugar, toothpaste, litmus paper, lemon juice, common metal strips, chalk, charcoal, food coloring, most foods (except raw meat), ice and cold water. For any other chemicals, I suggest using the rules above strictly. For this short list of chemicals, I recommend using the rules to model safe practices. And the soap is ok only if no one gets soap in his/her eyes. If the water is heated, goggles and aprons are mandatory.
I know. This set of rules seem to take the fun out of science. But safety must come first. Try using colored goggles that fit well and inexpensive plastic aprons aprons that students can autograph with marking pens. Hang safety posters on the walls and discuss safety rules with students before they do the activities. Discuss safety before and after a demonstration. Let students brainstorm safety needs.
Is this an exhaustive list? NO. This is just an introduction to the topic of safe procedures in science activities. It is the basic requirements for any science activity that uses chemicals other than those that are inert or only weakly reactive. Salt, vinegar, baking soda, dishwashing liquid, cooking oils, soap, litmus paper, purple cabbage extract, etc., are safe to use without taking extra safety precautions. Remember, mixing household cleaning products could release poisonous gases. Know which household chemicals are safe to use without precautions and which are not.
Accident Clean-up Kit for Spills and Breaks
What is an accident clean-up kit? Spills happen. Most chemical activities involve at least one acid or base. Glass breaks. Fires are needed to heat substances. Having some items at hand to take care of any potential problems is necessary.
In my non-lab classrooms, I found these supplies allowed me to do chemical activities safely.
- Spills can be contained using sand or kitty litter. Keep a bucket of the stuff handy--with a scoop--to toss onto a spill. Use a broom or brush and a dustpan to sweep up the mess that is now much drier. Dispose in a plastic bag stuck into an old coffee tin or oatmeal box--or larger heavy plastic paint can, whatever you have with a lid. Be sure the container will not react with the chemical spilled. Then use a copious amount of water to rinse the surface of the floor or table. Use litmus paper to check if the surface is acidic or basic. If so, neutralize. If the chemical is organic, use soap. Most inorganic chemicals will rinse away--but you have to know if they will react with metal plumbing, create poisonous gases, or irritate the skin. So soak up the rinse water with a sponge, while wearing kitchen-weight rubber gloves, and rinse several times. Keep the water running down the drain for minute or so.
- ...
- Keep baking soda and vinegar around to use as quick buffers for neutralizing weak acids and bases that spill or splash on someone. I buy baking soda by the pound
box at the grocery store and keep it in old parmesan cheese plastic
jars with the sprinkle tops. It will buffer acids in the dust left
after the sand or kitty litter is swept up. A bit poured on the spill
before the sand or kitty litter is poured helps, too. It will wipe
up when you rinse with your sponge and cold water.
- If the spill is acidic, then the baking soda will fizz until the acid is neutralized.
- Use the bottle of vinegar to further clean up after a base spill. Test the vinegar-treated spill with a bit baking soda to see if it fizzes. In the case of bases treated with vinegar, you want to have some active vinegar left over to make the baking soda fizz. Rinse well.
- If strong solutions are needed, pour out small quantities into a small capped container and use this in the activity. Keep the larger stock bottle locked away from the children. Use eye droppers (dropping pipets) to transfer liquids drop by drop, or pour carefully.
- Always add to water. Never put an acid or base into a container and then add the water. The mix will splatter.
- To be sure that the chemical doesn't eat through the container, purchase bottles, caps, test tubes, and beakers from science supply or school supply sources. Nalgene plastics and pyrex or kymex glass make safer container for chemicals.
- ..
- Keep bottles of water on the prep/demo table. If you do not have a sink within 2 feet of the activity, use 2 liter drink bottles or gallon milk jugs to distribute water around the area. This can be used to rinse up a spill. Most importantly, it can be used to immediately rinse the skin of anyone that is splashed. Keep a bottle of sterile water (unopened bottled water or distilled water) close to hand to immediately rinse an eye that gets splashed. To catch the water, I used shallow, rimmed plastic trays or teflon-coated metal baking dishes to carry supplies to student stations/desks and then told students to pour over the trays if water (or other liquid) was used. Of course, for a rinse of skin or eye, a mess didn't matter. Hide a few extras at your desk for replacement and refills. Water spills, too. Be sure to tell the students that the bottles are not clean enough to drink from, just rinsed out. They do get thirsty.
- ..
- Have a fire extinguisher and sand nearby if you do anything at all with flames: candles, alcohol burners, matches, whatever.This is required. If the fire extinguisher for your classroom is down the hall, make arrangements with a student to hang near the door and go for it if necessary; make arrrangement with your principal to provide one that you can carry into your room for the time of the activity; inform all of the teachers that share the extinguisher that you will have it in your room for the activity; or purchase a small one just for your room for your convenience for several activities. You will also have alternatives to a fire extinguisher. Another use of the sand is to throw it on a small flame. Just like at home, baking soda can be used as in a small kitchen-type fire. And don't forget the water in the bottles, but do not use water on electrical, oily, or certain chemical fires. Even so, have easy access to the fire extinguisher. Discuss with students that if a fire starts and you do not immediately put it out, they are to evacuate the room, walk calmly outside and gather at the fire drill area, with one student telling the teacher next door to get help on his way out.
- ..
- Pick up broken glass with dampened old newspapers or paper towels. The damp paper should collect all the little glass splinters.Wrap the glass pieces and damp paper in old newspapers and place the bundle into a trash bag. This keeps the shards from tearing through the trash bag and cutting anyone that removes the trash. Another technique is to keep a broken glass box, which can be an oatmeal box, a coffee can or a cardboard box. Label it and keep it where the students cannot get into it. Toss broken shards into it. When you get ready to dispose of the glass, wrap it in newspaper and throw it out. If the box has a lid and you intend to throw the box out with the glass, secure the lid with tape and discard the whole box.
Use Safe Surfaces and Proper Apparel
for Chemistry Activities
What is a chemically inert surface? You cannot do chemistry activities on top of paper or cardboard like you can with art activities. You cannot do chemistry activities on a desk covered with papers and books. Use a table covered with melamine or some kitchen-like counter top. If you use a wood surface, purchase the paint for chemical lab desks from a science supply resource and paint the surface. Or use fiberglass, plastic or enameled metal trays like those mentioned above. Drop a bit of chemical on the surface of a tray you plan to use. If it reacts with the surface, you know that a spill will be dangerous. Use another surface for your activity. Try a teflon-coated tray, a ceramic tile, an enamaled metal panel from the side of an old appliance, or old broiler pan.
What are chemical splash goggles and plastic or rubber aprons? These items are sold by school and science supply houses. Sometimes you can get them at hardware stores. The important thing is to look for the OSHA Approved label and that they are chemical splash goggles and aprons. The goggles for shop are not the same as chemical splash goggles. White lab coats and simple cloth aprons will not protect from chemical splashes. Any child not wearing this safety gear must watch the activity from a safe distance. This safety gear is also necessary for children boiling water in a science class. Some school districts might prefer face shields to goggles, but one of them must be worn. Don't let student complaints of being too hot and sweaty and uncomfortable deter you! Goggles come in small sizes and bright colors now, and aprons can be personalized with flourescent markers to make them more fun to wear.
Label Containers
What is a properly-labeled chemical container? It is usually better to store a chemical in the original container. That way you have its name and safety information that is on the bottle. Use a marker to put the date of purchase on the container. It also helps to know the date the container was first opened. If you mix a solution or other mixture, or transfer a small amount to a bottle for use in the activity, you must label the new bottle. Tape a paper label on the container. If there is no room for the needed information, or you want the chemical to be an unknown, use a number or letter matched to another paper or card with the proper information. Include the following information on your label:
- name of chemical(s) and solvent if dissolved in anything.
- date prepared
- who prepared it
- concentration
- original amount, marked or measured
- safety information or reference to such information
- comments
Resources for more Safety Rules Information
What are all the safety rules? For more about safe practices, check with NSTA. Also, Flinn Scientific puts safety information for teachers online and in their catalog. High school science textbooks have safety information and basic rules lists. The written rules often require a bit of interpretation, so read information from several sources. Finally, make friends with a high school chemistry teacher and network.
About the Author
What is my background? As a high school chemistry, physics, and biology teacher and a college biology instructor, I have had to concentrate on safe practices for teaching science. My association with elementary school teachers and my experiences with small children have caused me to think about what safety during an elementary school science lesson and preparation would entail. Also, of course, I have been trained in school science lab safety.
Essay by Valerie Coskrey ©2007, 2009